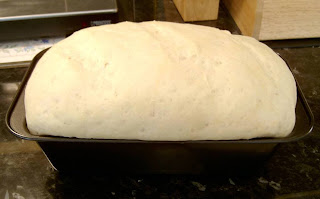
Once or twice a week I made bread. I used a recipe from a free publication, Penny Planner's Cookbook, which was distributed by the State of Pennsylvania. This is a basic recipe for white bread. I improved the nutrition of it by substituting whole wheat flour for 2 cups of white, and a cup of wheat germ for another. I also used honey instead of sugar.
Cookbooks and websites are full of fancy bread recipes, which is fine, but every frugal homemaker should have a basic recipe to start with. Once you make it a couple of times it becomes second nature and, with bread in the store going for three dollars or more, this is quite a savings. This is super easy. Why not give it a try:
WHITE BREAD |
| 1 package active dry yeast ¼ cup lukewarm water | 2 cups hot water 2 tablespoons butter, softened 2 tablespoons sugar 2 teaspoons salt |
| 6 cups white flour 1 ½ cups nonfat dry milk |
| Soften yeast in lukewarm water and stir well. Add butter, sugar and salt to the 2 cups of hot water and mix well. Cool to lukewarm. Mix flour and dry milk together. Using an electric mixer if you like, stir 2 cups of the flour mixture into the 2 cups liquid. Mix thoroughly. Add the softened yeast mixture and beat on medium speed, or beat well by hand. Now all you have to do is add the rest of the flour mixture. If you have a dough hook you can use your mixer. If not, stir it in by hand until you have dough suitable for kneading. But don’t knead it yet. Cover the bowl and let it sit for 10 minutes, while you take a break (or wash your measuring cups and spoons). |
| After the dough has rested, knead it for about 10 minutes, then cover it and let it rest again for 10 minutes. This time while it is resting grease two 5” by 9” loaf pans. |
| Now, shape the dough into 2 loaves. I like to do this by rolling each half with a rolling pin, as if I to make pie crust or cookies. Then I roll it up into a loaf shape. This gives my bread a good consistency and keeps it from getting large bubbles inside (good for French bread, maybe, but not sandwiches). Put the loaves in the pans, brush the tops with melted butter or oil, and cover with plastic wrap. At this point, you can actually put the unbaked loaves into the fridge, if you want to bake after your class, or the kid’s game, or even tomorrow morning. The dough will rise slowly in the fridge. |
| When you are ready to bake, take out the loaves and let rise until they are nicely rounded over the tops of the pans, but not too high. This may take half an hour or so. Preheat the oven while the dough is rising, then bake at 350 degrees for 45 to 50 minutes. Dump loaves out of the pans as soon as you take them out of the oven. If you want soft crusts, brush with butter and cover with a cloth while the loaves cool. |
My kids' favorite sandwiches "back in the day" were peanut butter & honey & wheat germ on Mom's home made bread. Well, maybe they would have preferred Pop Tarts but they weren't offered in my house!
What's your favorite healthy sandwich?


2 comments:
Wow! The perfect loaf and wonderful pictures! I might try this recipe. I do use a bread machine, but only for the hard part. After all the mixing and the first rise I take the dough out and do my own thing. Really, while it is mixing and tossing flour around, I am doing something with a paint brush!
Jude **
Ever the multi-tasker. Good for you! I'll be busy this weekend but hope to do some painting next week!
Post a Comment